

cobalt123
Platinum Member
not mine: needed to be saved however
HOW TO: relocate back seat Release Poper
alright we all know these things rattle and jump around with any size sub and make the sound system sound like crap.
also mine keep falling off.. we cant just remove them cause the seats would never fold down.... so lets MOVE THEM!
tools need
flat head screw driver
nothing more.
will take about 15-20 mins of time
Step #1
Pop the trunk and release the back seats and then hop in the back and fold them down. at this point it mite be a good idea to move your drivers seat forword as well as the passenger seat..
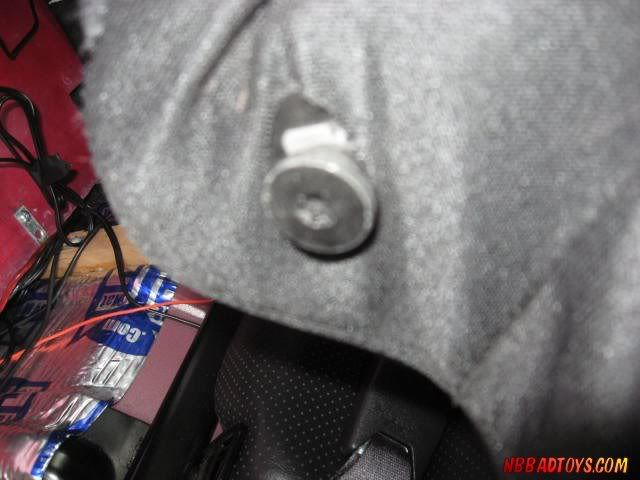
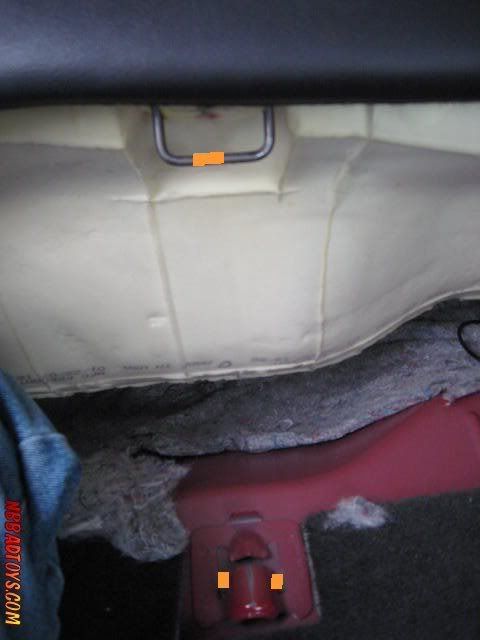
Step #2
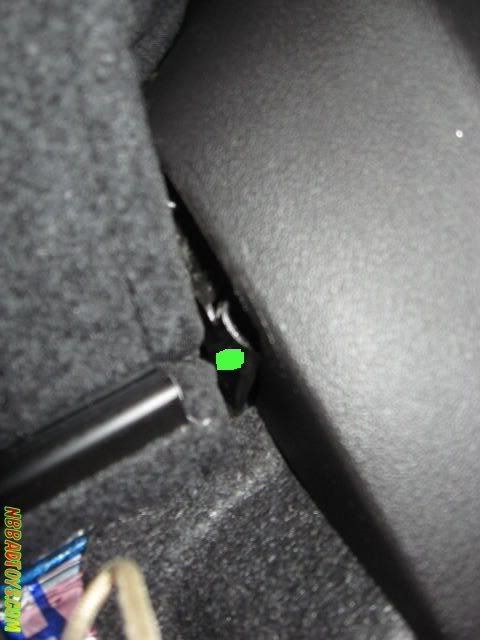
stick a screw driver in long side of the back part of the seat to release it .... the release is closest to each side of the car (repeat on other half of theseat)
the next few pics will give you a better look at what the hell im talking about. many people have an issue finding this release. hope this makes it clear.
as you can see my seats have been out a few times the release tab is scratched really badly. it just lightly pushes in as you pull up on the seat back
the green shows where to stick the screw driver... look at the next few pics as well.
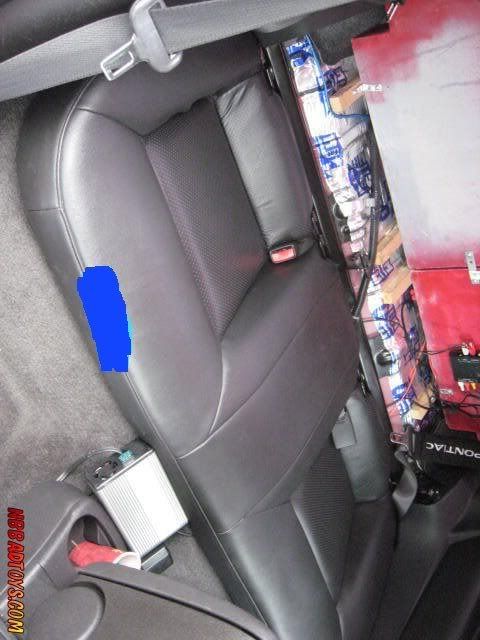
Step #3 remove back seat seat part...lol
the area you see in blue is aprox where you want to smash up agasint with your knee wile slightly pulling up the seat... yes this sound retarded but its the only way i can think of to remove the seats. dont be scared to really put a bit of foce into it.
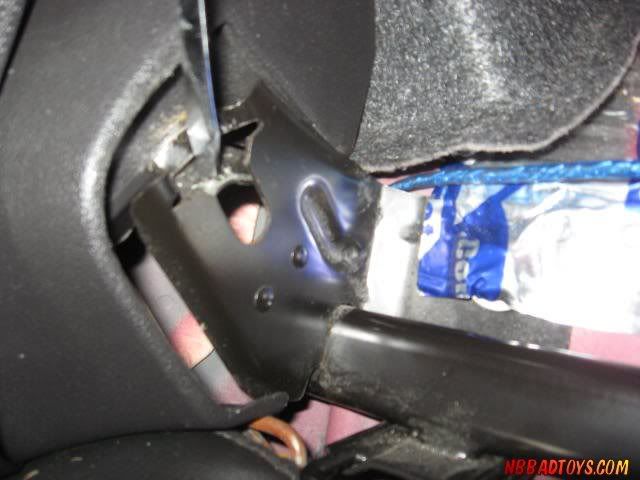
these next few pics will give you a better understanding of how its attached.
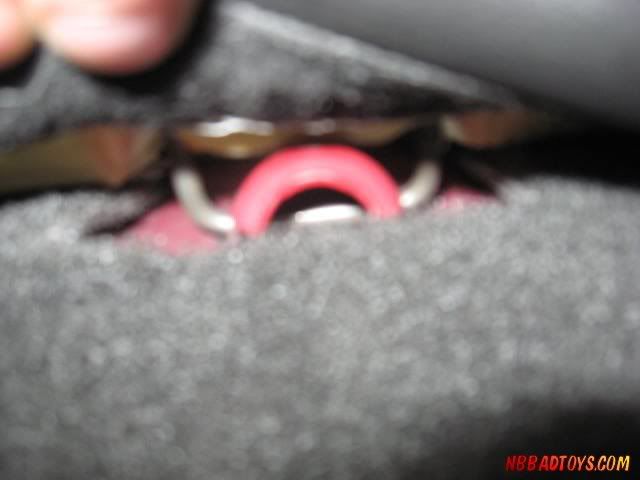
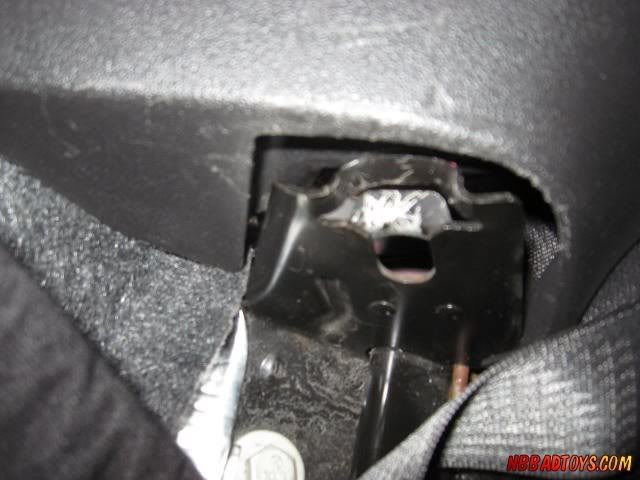
the green shows where the metal latch bar would normaly sit under the clip
the orange shows how it connects to the clip
Step #3 and 1/2
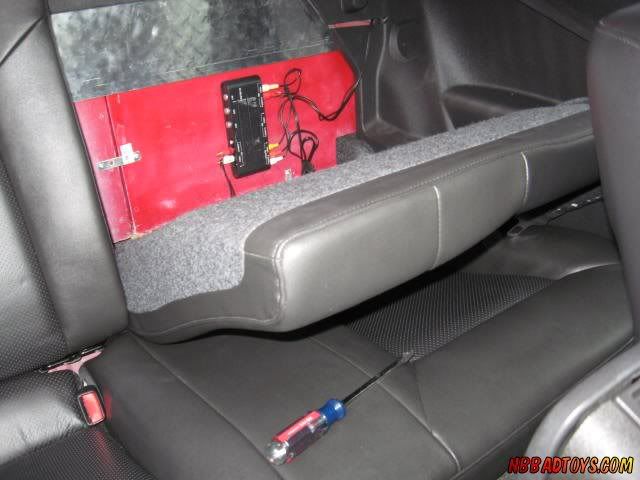
ah yes you have removed the back seats.. aint it pretty .. mind you mine has extra wires and things that most likly arnt in your car.. ignore those..lol

note i also removed my rear deck for a unrelated project. you dont have to do that.
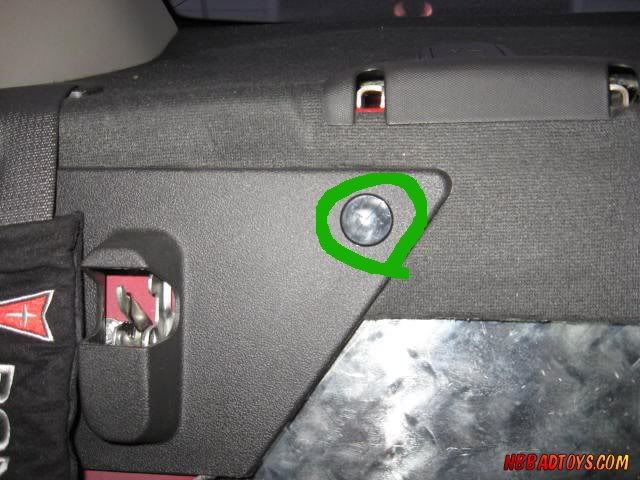
Step #4 .. remove these clips
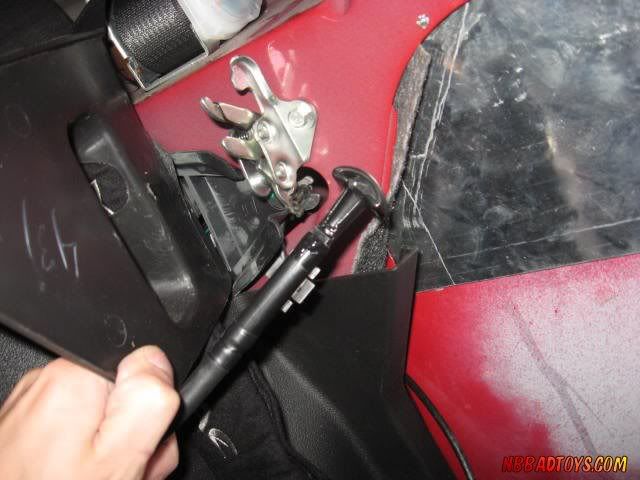
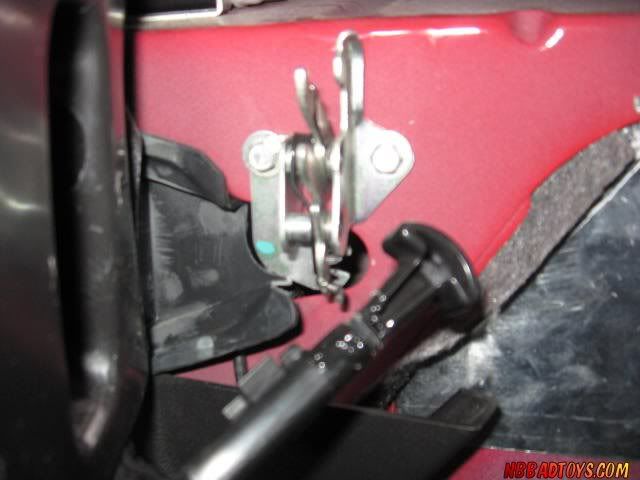
Step #5
go in the trunk pull down the clips holding the cable to the release button
Step #6
look to the side of the car over each wheel well. (from the trunk)
you will see a hole that goes into the back of the car. feed the release cable /button thur hole
Step #7
go into back seat and grab the cable
Step #8
feed it behind the plastic panel and carpet. this was hard in my car with the sub boxes in. yours will be much easyer.
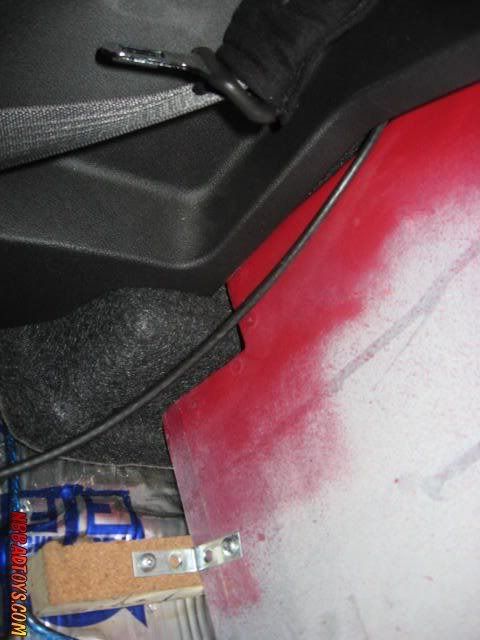
keep feeding it under the plastic side panle just tuck it up under there best you can. it should hold faily tight
--See my video for a better look on how i tucked it under the side plasic piece.
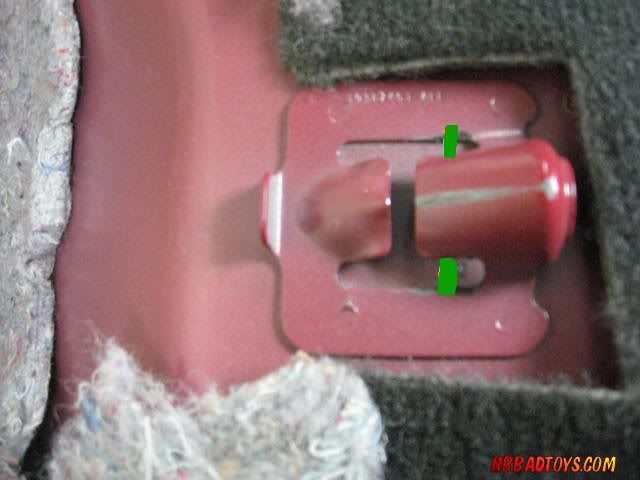
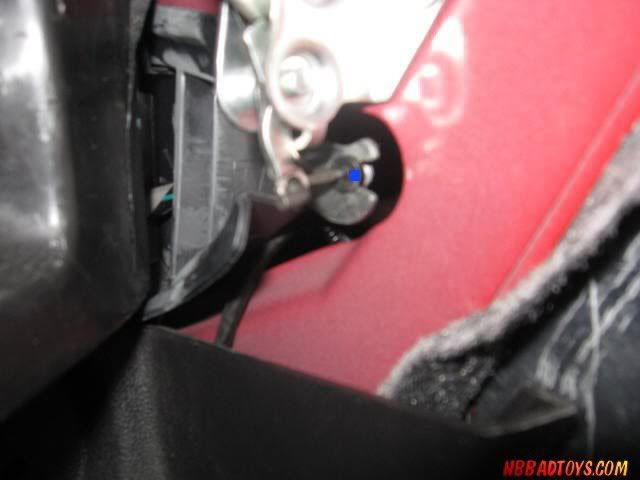
Step #9
make sure the black ring thingy is still in the slot that it should click into (blue dot on part im talking about)
Step# 10 -- repeat on other side.
and then your done
HOW TO: relocate back seat Release Poper
alright we all know these things rattle and jump around with any size sub and make the sound system sound like crap.
also mine keep falling off.. we cant just remove them cause the seats would never fold down.... so lets MOVE THEM!
tools need
flat head screw driver
nothing more.
will take about 15-20 mins of time
Step #1
Pop the trunk and release the back seats and then hop in the back and fold them down. at this point it mite be a good idea to move your drivers seat forword as well as the passenger seat..
Step #2
stick a screw driver in long side of the back part of the seat to release it .... the release is closest to each side of the car (repeat on other half of theseat)
the next few pics will give you a better look at what the hell im talking about. many people have an issue finding this release. hope this makes it clear.
as you can see my seats have been out a few times the release tab is scratched really badly. it just lightly pushes in as you pull up on the seat back
the green shows where to stick the screw driver... look at the next few pics as well.
Step #3 remove back seat seat part...lol
the area you see in blue is aprox where you want to smash up agasint with your knee wile slightly pulling up the seat... yes this sound retarded but its the only way i can think of to remove the seats. dont be scared to really put a bit of foce into it.
these next few pics will give you a better understanding of how its attached.
the green shows where the metal latch bar would normaly sit under the clip
the orange shows how it connects to the clip
Step #3 and 1/2
ah yes you have removed the back seats.. aint it pretty .. mind you mine has extra wires and things that most likly arnt in your car.. ignore those..lol
note i also removed my rear deck for a unrelated project. you dont have to do that.
Step #4 .. remove these clips
Step #5
go in the trunk pull down the clips holding the cable to the release button
Step #6
look to the side of the car over each wheel well. (from the trunk)
you will see a hole that goes into the back of the car. feed the release cable /button thur hole
Step #7
go into back seat and grab the cable
Step #8
feed it behind the plastic panel and carpet. this was hard in my car with the sub boxes in. yours will be much easyer.
keep feeding it under the plastic side panle just tuck it up under there best you can. it should hold faily tight
--See my video for a better look on how i tucked it under the side plasic piece.
Step #9
make sure the black ring thingy is still in the slot that it should click into (blue dot on part im talking about)
Step# 10 -- repeat on other side.
and then your done