

cobalt123
Platinum Member
Disclaimer: I cant take credit for the how-to, if its yours pm me will discuss it there.
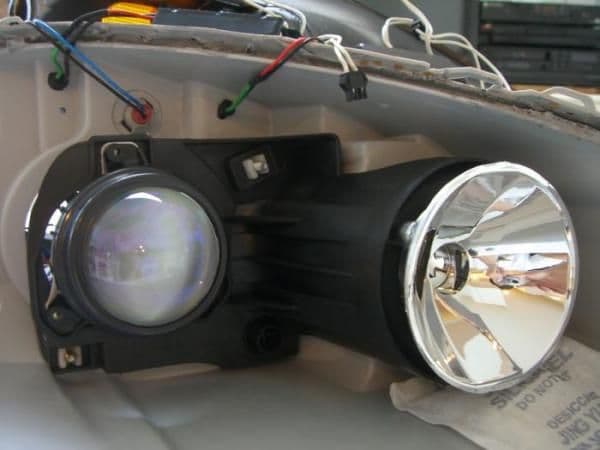
1) take out ur lights....bake it (275F pry off hinges..and pull) ...take off the light cover...
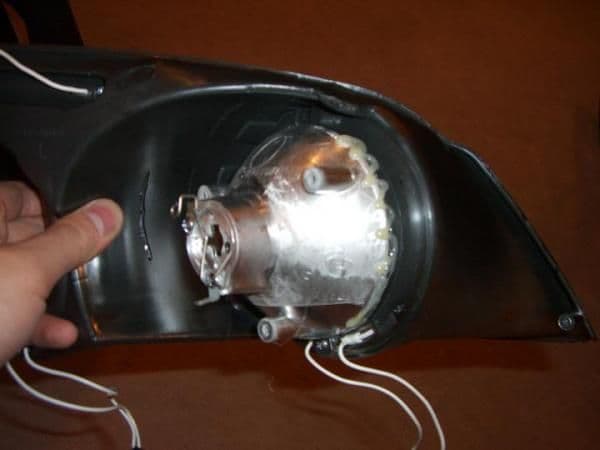
2) there are 3 screws to undo to remove the reflector...and after that...u must remove the wirings+ adapter for the halos
3) so now the process begins....remove the high beam reflectors....there should be 3 screws
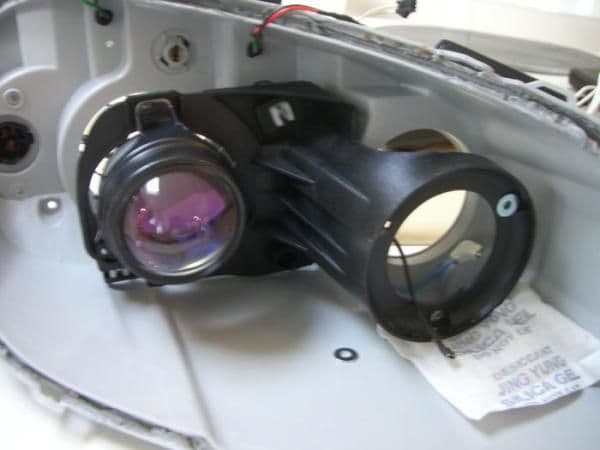
4) now take the black piece of thingy holding the projector and the high beams....unscrew the aiming bolts for the projectors as much as possible then pop out the ball joint located on the bottom middle of the black pastic thingy
no picture....forgot...
5) take the projector apart 3 bolts
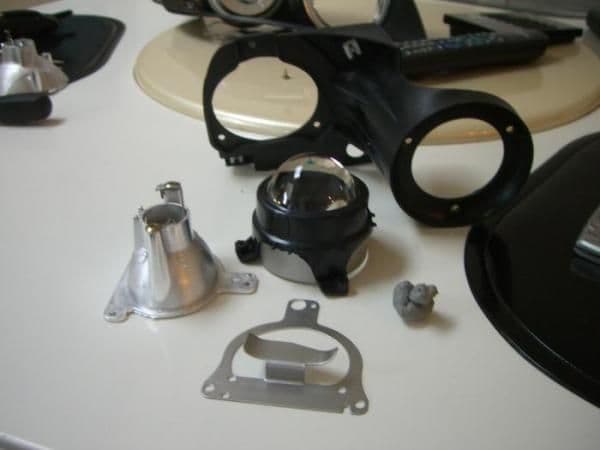
6) the original cut-off sheild is crappy....and bent...although some people with these projectors have nice cutoffs i obviously dont....so made it straight...er
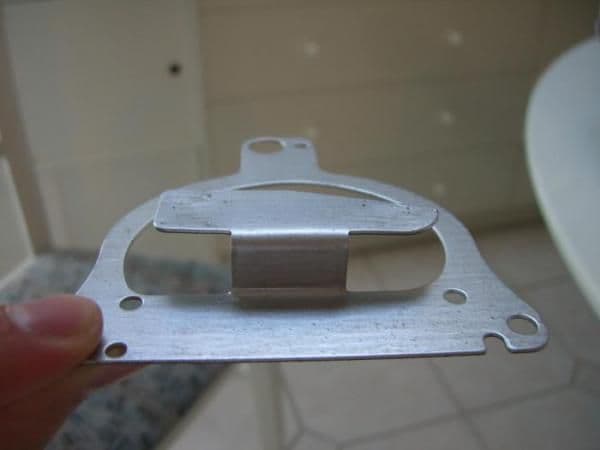
7) find some kinda of aluminum plate....( i used a large old pencil box...or sunglass box...) measure out a half circle according to the size of the project and cut! (sheet metal scizzors!!!) CUT THE HALF-CIRCLE LARGER THEN TRIM TO SIZE!!!!!!!!!!
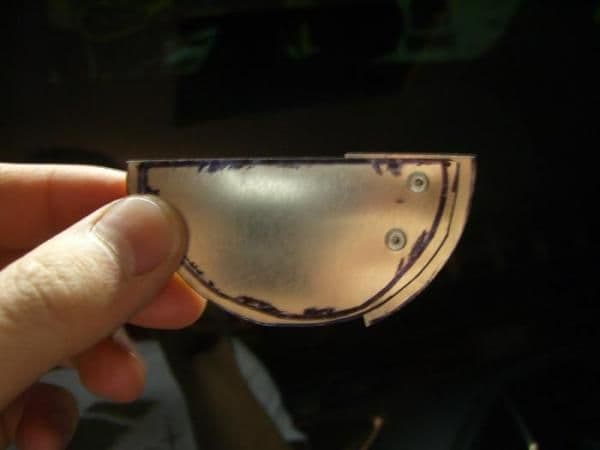
8) attach the new self-made cut off shield to the oringal one by whatever means....NO GLUEGUN OR TAPE!!! i used rivets...saw someone else use screws
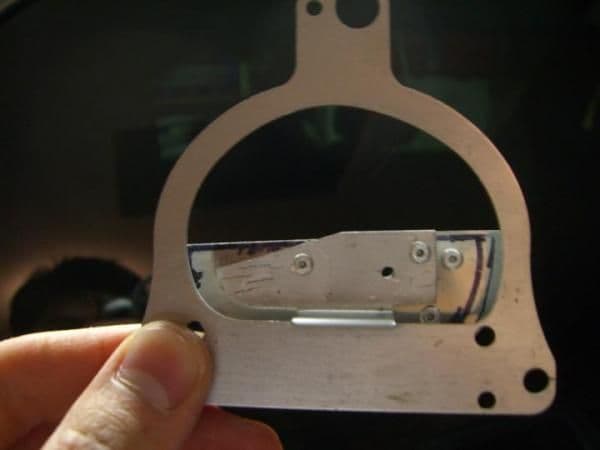
9) re-assemble the projector together along with the black pastic thingy THAT HAS BEEN CUT to only hold the projectors
by doing this...u have more control of the projectors without moving the high beams at all....
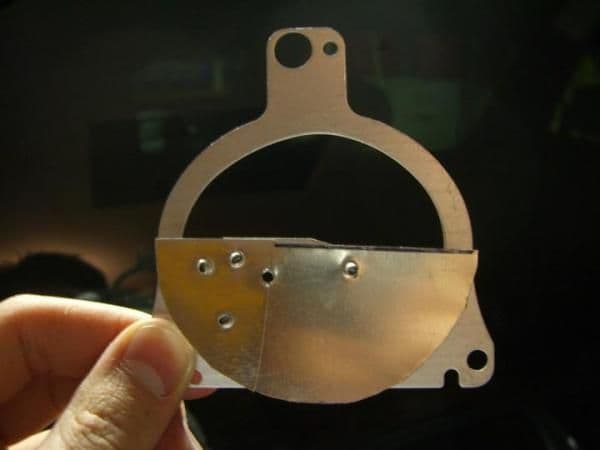
10) GLUE-GUN the high beam reflectors on to the Bigger reflector....NOTE!!!! I GLUED IT RIGHT ON...BUT MY HIGH BEAMS ARENT THAT HIGH SO I ADVISE YOU TO TILT THE HIGH-Beam reflector UP 1/8 INCH or 0.5 CM THEN GLUE
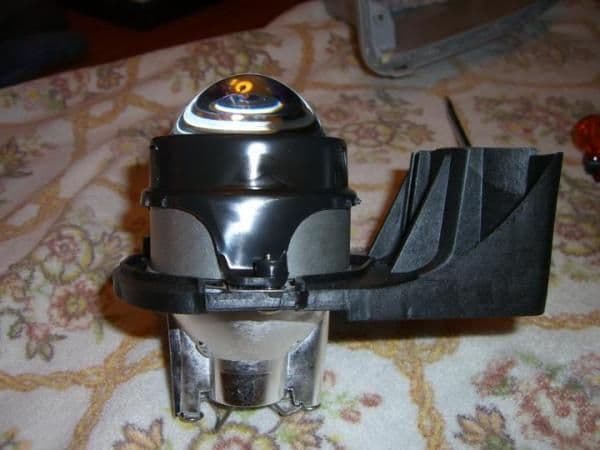
11) assemble everything together and install the lights back on and aim!!
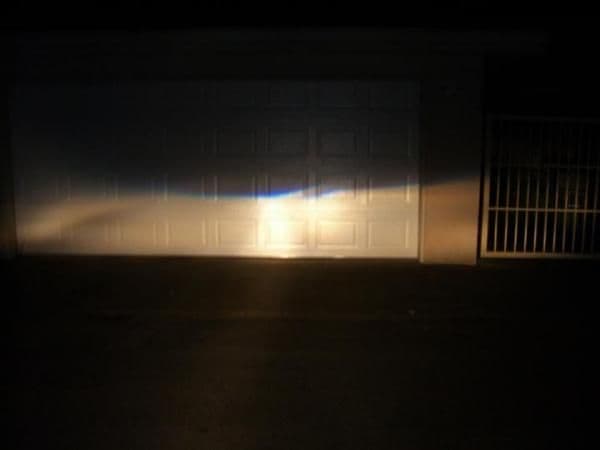
Before with halogens
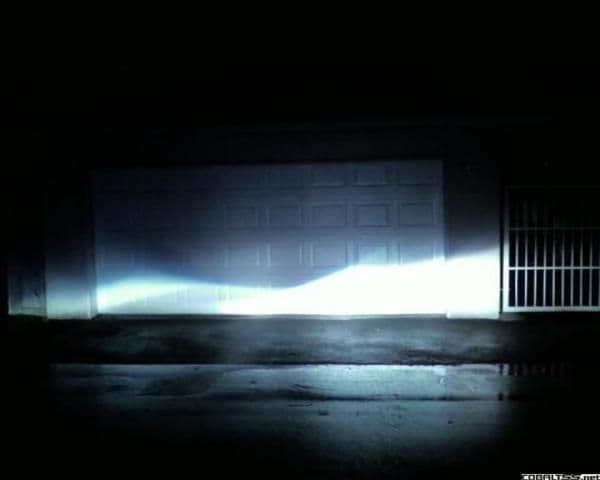
after with halogens
after with HIDs
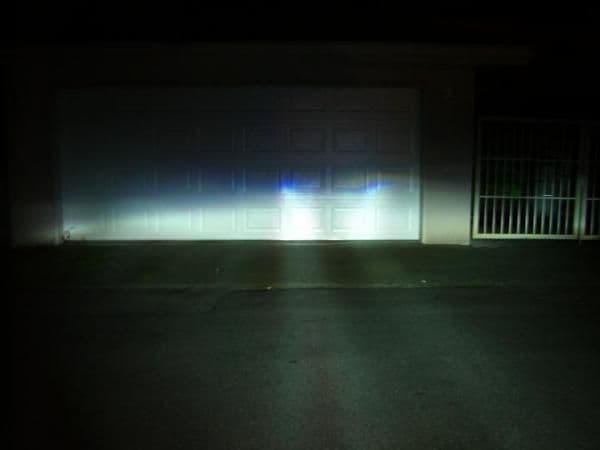
the cutoff doesnt really show here.......but i give up...they look fine....bright...and they dont blind anyone DONE DEAL!!
1) take out ur lights....bake it (275F pry off hinges..and pull) ...take off the light cover...
2) there are 3 screws to undo to remove the reflector...and after that...u must remove the wirings+ adapter for the halos
3) so now the process begins....remove the high beam reflectors....there should be 3 screws
4) now take the black piece of thingy holding the projector and the high beams....unscrew the aiming bolts for the projectors as much as possible then pop out the ball joint located on the bottom middle of the black pastic thingy
no picture....forgot...
5) take the projector apart 3 bolts
6) the original cut-off sheild is crappy....and bent...although some people with these projectors have nice cutoffs i obviously dont....so made it straight...er
7) find some kinda of aluminum plate....( i used a large old pencil box...or sunglass box...) measure out a half circle according to the size of the project and cut! (sheet metal scizzors!!!) CUT THE HALF-CIRCLE LARGER THEN TRIM TO SIZE!!!!!!!!!!
8) attach the new self-made cut off shield to the oringal one by whatever means....NO GLUEGUN OR TAPE!!! i used rivets...saw someone else use screws
9) re-assemble the projector together along with the black pastic thingy THAT HAS BEEN CUT to only hold the projectors
by doing this...u have more control of the projectors without moving the high beams at all....
10) GLUE-GUN the high beam reflectors on to the Bigger reflector....NOTE!!!! I GLUED IT RIGHT ON...BUT MY HIGH BEAMS ARENT THAT HIGH SO I ADVISE YOU TO TILT THE HIGH-Beam reflector UP 1/8 INCH or 0.5 CM THEN GLUE
11) assemble everything together and install the lights back on and aim!!
Before with halogens
after with halogens
after with HIDs
the cutoff doesnt really show here.......but i give up...they look fine....bright...and they dont blind anyone DONE DEAL!!
Last edited: