

TOOLS NEEDED
10MM RATCHET WRENCH
13MM DEEP SOCKET
14MM DEEP SOCKET & BOX END WRENCH
15MM DEEP SOCKET
13MM SOCKET & OPEN BOX END WRENCH
15MM SOCKET & OPEN BOX END WRENCH
JACK AND STANDS, OR RAMPS (or a car lift if your lucky)
RATCHET AND 6" & 3" EXTENSION
FLASHLIGHT
PENETRATING FLUID
O2 SENSOR SOCKET, OR 7/8 BOX END WRENCH
(Step 1)
Jack up the car and put on jack stands and make sure care is secure. Let the car cool down. (If you have a strut bar, this is a good time to remove it. Makes install much easier)
(Step 2)
Remove top and bottom heat shields. (Top = 3 13MM bolts) (Bottom = 1 15MM bolt & 10MM bolt) Remove the 10mm bolt from the top.
(Step 3)
Spray down all 10 bolts on the manifold, the 3 bolts on the manifold/downpipe and the 2 bolts on the downpipe/catback with penetrating fluid. (This will make this whole process much easier!)
(Step 4)
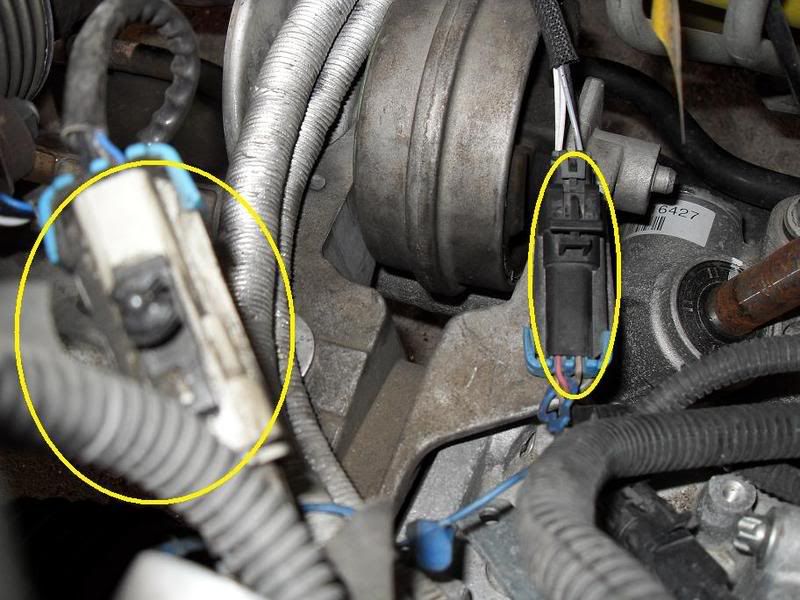
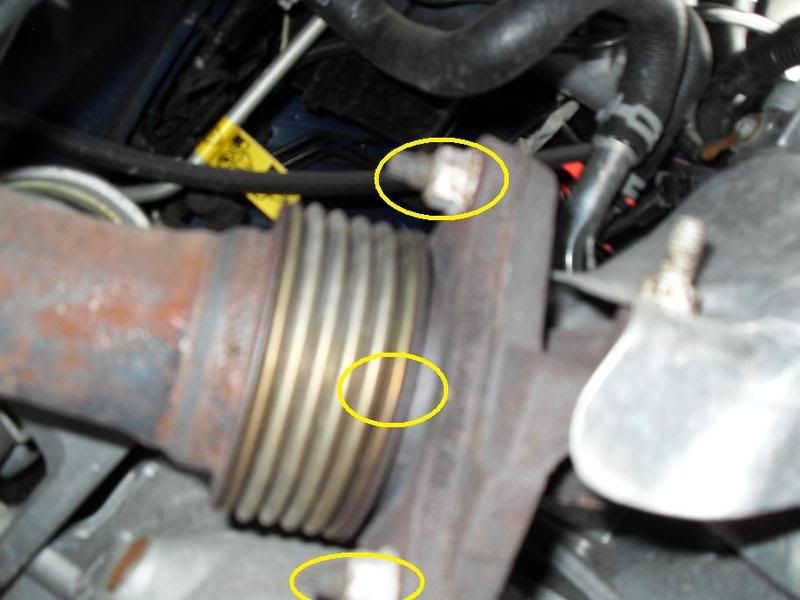
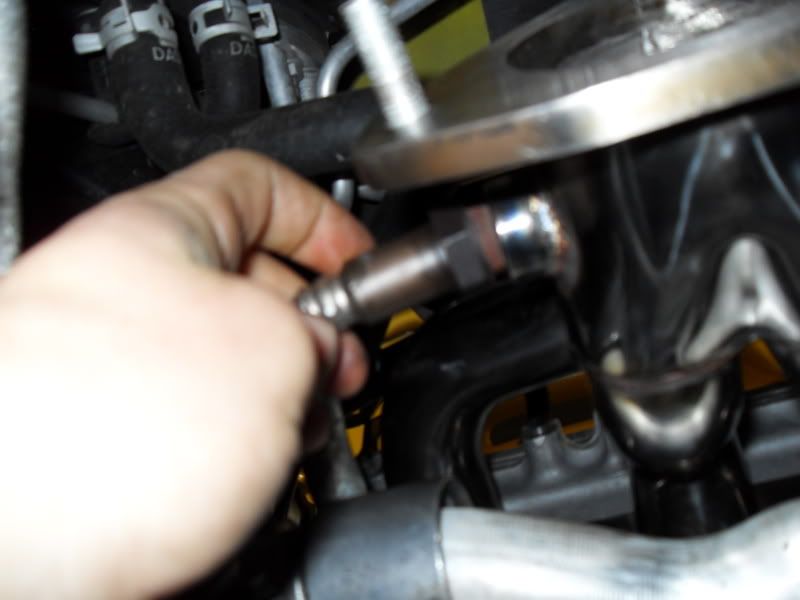
Unclip the oxygen sensors, There is a little blue tab that has to be pushed out which acts like a lock holding the 2 snaps together. The lower clip is to the downpipe sensor. The upper one is to the one on the manifold. (removing the downpipe makes this much easier, even if your just installing the header) Do not remove the sensor from the manifold yet. This will be done after the manifold is out.
(Step 5)
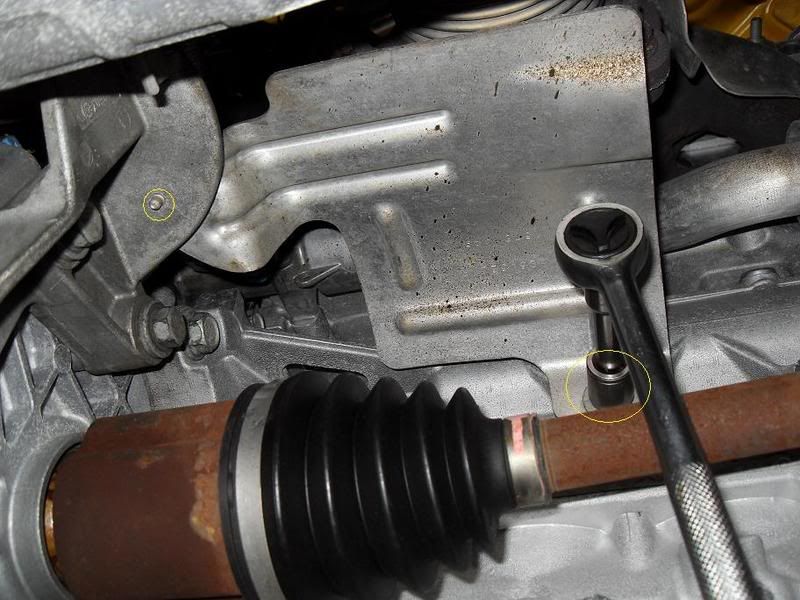
Remove the downpipe, Starting with the 2 rear 14MM bolts. You will need a wrench for the nut and the socket for the bolt.
Then use your 15 MM deep socket to remove the front 3 15MM nuts from the manifold/downpipe
Once you have the downpipe off the car, place it aside.
(Step 6)
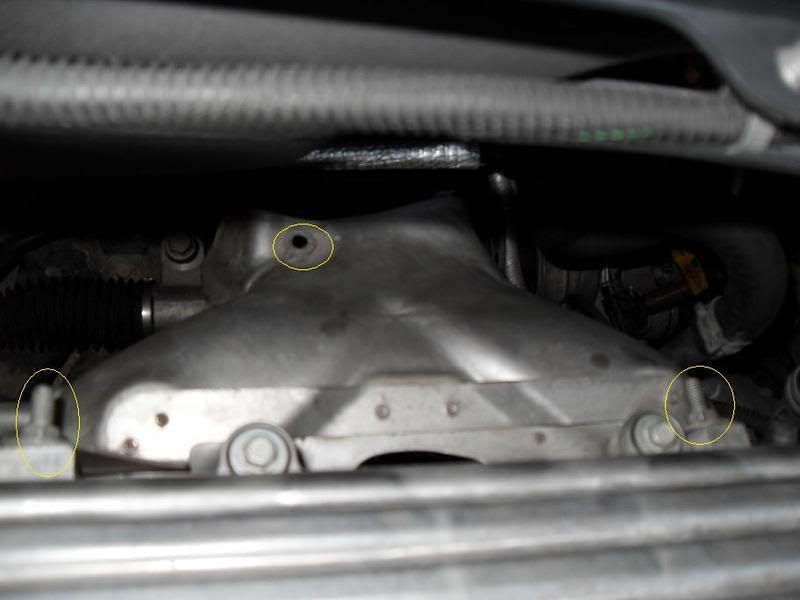
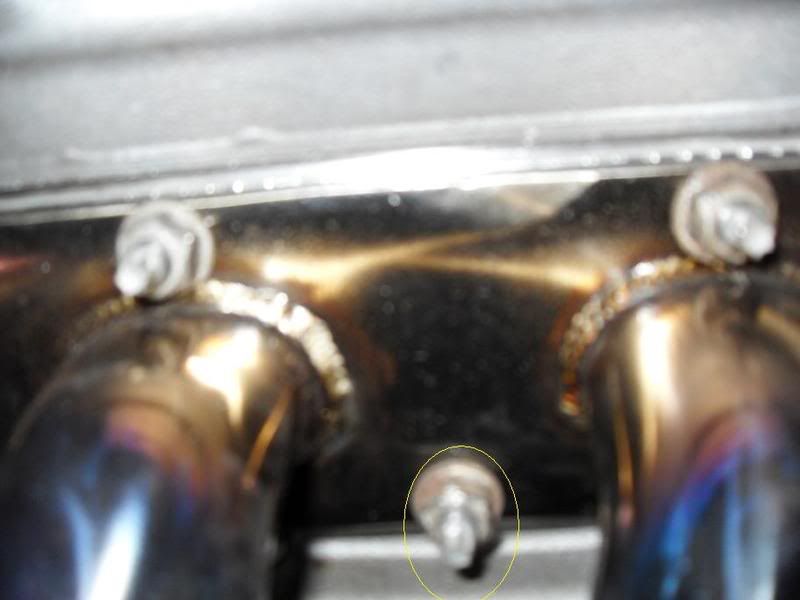
Removing the manifold, There are 10, 13MM nuts holding on the manifold that need to be removed. All but the 3 middle bottom nuts can be removed from the top. The others are easier to remove from the bottom. (ON AUTO's MOST OF THE WORK CAN BE DONE FROM THE TOP) The very middle bottom nut is a PITA! You will need a long extension and go at it above the manifold but still from under the car.
(Here is a pic that gives you an idea of the nuts to be removed. Sorry I do not have any pics with the stock manifold on)

The nut circled is the PITA one
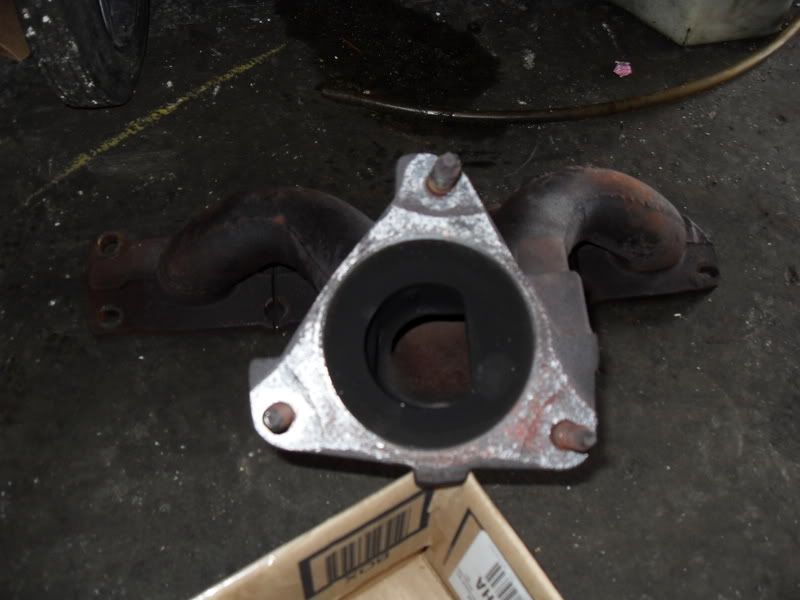
Once all nuts are removed, remove stock manifold and gasket. Inspect the head to be sure the area is clean and there are no obstructions that could cause leaks. Here is a pic of the manifold removed. (Very restrictive)
(Step 7)
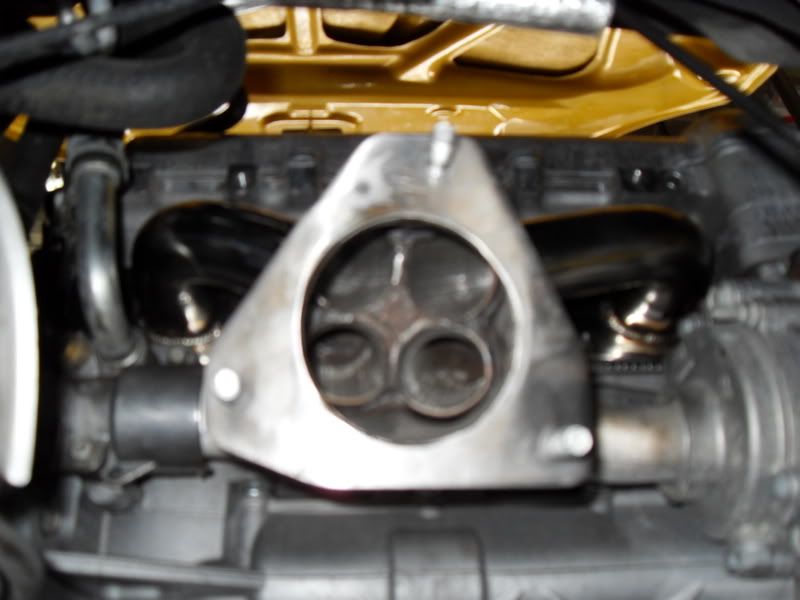
Installing the header, Place the new gasket and the header on the head bolts and finger tighten down all 10, of the 13MM nuts so the header sits in place like so.. (DO NOT USE ANY KIND OF GASKET SEALER!)
Go in order of the diagram below, torquing all 10 nuts down to 106in/lbs, followed by a 2nd pass, again in order, and make sure they're all at 106in/lbs") the 89in/lbs is for the exhaust shield studs.
the 89in/lbs is for the exhaust shield studs.

(Step 8 )
Remove oxygen sensor from the stock manifold, Using either an O2 sensor socket (A 7/8 deep socket with a slit down the side for the wires) or simply a 7/8 box end wrench. Next, take the sensor and screw it into the bung on the header. And give it just a little "snug" with the 7/8 wrench.
(If installing a new downpipe, Repeat this step for the O2 sensor on the downpipe.)
(STEP 9)
Installing the downpipe, This particular header came with 3 double threaded bolts and 3 nuts like so..
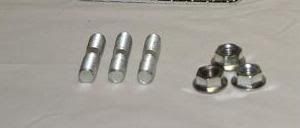
You will want to screw these bolts into the bottom flange of the header so there is only about 1/8 inch of threads before the middle non threaded part of the bolt.
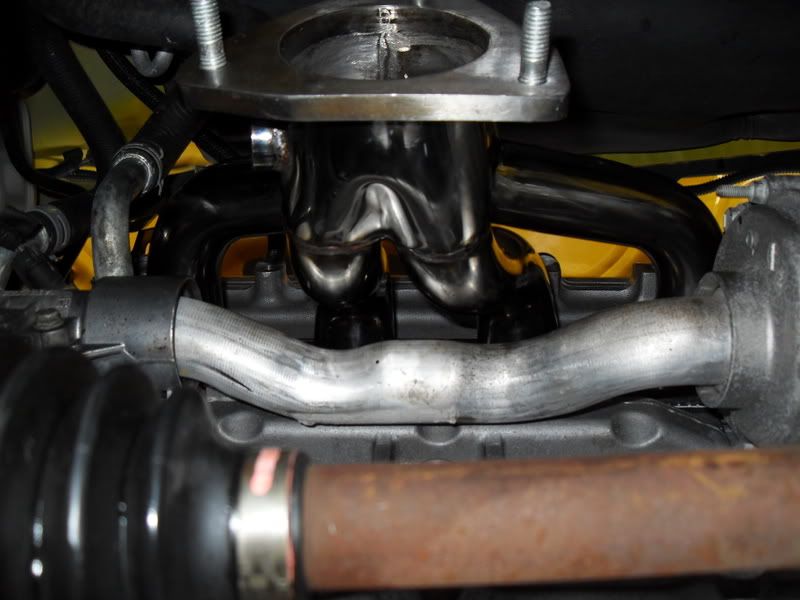
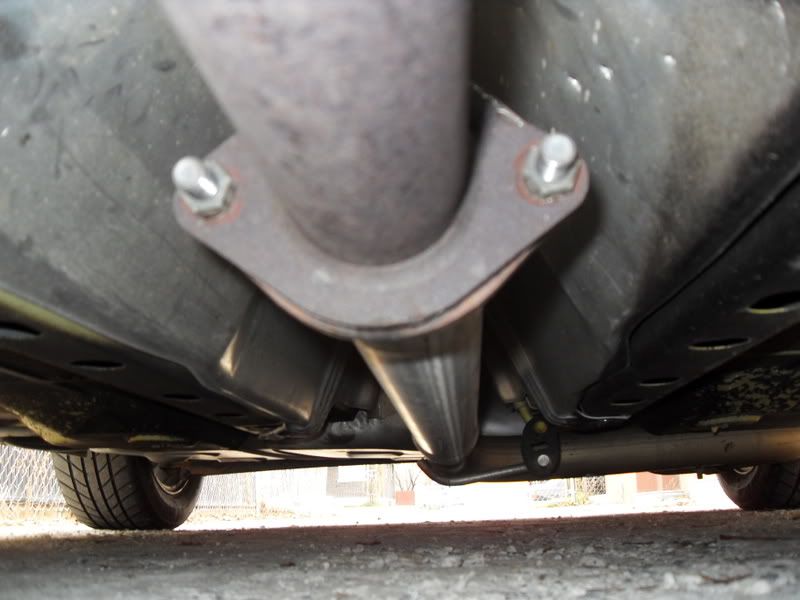
Next, pair the downpipe and header flanges together along with the new gasket. Finger tighten on all 3 of the 15MM nuts onto the bolts, and then tighten them with a ratchet. (Do not over tighten!) Be sure there are threads exposed on both sides, the header and beyond the nuts like this.
Once those bolts are tightened on, the rear downpipe flange should be pretty much mated up with the flange for the rest of the exhaust. Reinstall the 2, 14MM bolts.
(Step 10) Reclip both sensors, and reinstall the bottom heat shield. The top heat shield will take a little hand bending and manipulating but it can be reinstalled also, with the exception of one bolt.
Now start the car and check for leaks. If there are none, Go rip down the street and enjoy your new header!
10MM RATCHET WRENCH
13MM DEEP SOCKET
14MM DEEP SOCKET & BOX END WRENCH
15MM DEEP SOCKET
13MM SOCKET & OPEN BOX END WRENCH
15MM SOCKET & OPEN BOX END WRENCH
JACK AND STANDS, OR RAMPS (or a car lift if your lucky)
RATCHET AND 6" & 3" EXTENSION
FLASHLIGHT
PENETRATING FLUID
O2 SENSOR SOCKET, OR 7/8 BOX END WRENCH
(Step 1)
Jack up the car and put on jack stands and make sure care is secure. Let the car cool down. (If you have a strut bar, this is a good time to remove it. Makes install much easier)
(Step 2)
Remove top and bottom heat shields. (Top = 3 13MM bolts) (Bottom = 1 15MM bolt & 10MM bolt) Remove the 10mm bolt from the top.
(Step 3)
Spray down all 10 bolts on the manifold, the 3 bolts on the manifold/downpipe and the 2 bolts on the downpipe/catback with penetrating fluid. (This will make this whole process much easier!)
(Step 4)
Unclip the oxygen sensors, There is a little blue tab that has to be pushed out which acts like a lock holding the 2 snaps together. The lower clip is to the downpipe sensor. The upper one is to the one on the manifold. (removing the downpipe makes this much easier, even if your just installing the header) Do not remove the sensor from the manifold yet. This will be done after the manifold is out.
(Step 5)
Remove the downpipe, Starting with the 2 rear 14MM bolts. You will need a wrench for the nut and the socket for the bolt.
Then use your 15 MM deep socket to remove the front 3 15MM nuts from the manifold/downpipe
Once you have the downpipe off the car, place it aside.
(Step 6)
Removing the manifold, There are 10, 13MM nuts holding on the manifold that need to be removed. All but the 3 middle bottom nuts can be removed from the top. The others are easier to remove from the bottom. (ON AUTO's MOST OF THE WORK CAN BE DONE FROM THE TOP) The very middle bottom nut is a PITA! You will need a long extension and go at it above the manifold but still from under the car.
(Here is a pic that gives you an idea of the nuts to be removed. Sorry I do not have any pics with the stock manifold on)
The nut circled is the PITA one
Once all nuts are removed, remove stock manifold and gasket. Inspect the head to be sure the area is clean and there are no obstructions that could cause leaks. Here is a pic of the manifold removed. (Very restrictive)
(Step 7)
Installing the header, Place the new gasket and the header on the head bolts and finger tighten down all 10, of the 13MM nuts so the header sits in place like so.. (DO NOT USE ANY KIND OF GASKET SEALER!)
Go in order of the diagram below, torquing all 10 nuts down to 106in/lbs, followed by a 2nd pass, again in order, and make sure they're all at 106in/lbs
the 89in/lbs is for the exhaust shield studs.
(Step 8 )
Remove oxygen sensor from the stock manifold, Using either an O2 sensor socket (A 7/8 deep socket with a slit down the side for the wires) or simply a 7/8 box end wrench. Next, take the sensor and screw it into the bung on the header. And give it just a little "snug" with the 7/8 wrench.
(If installing a new downpipe, Repeat this step for the O2 sensor on the downpipe.)
(STEP 9)
Installing the downpipe, This particular header came with 3 double threaded bolts and 3 nuts like so..
You will want to screw these bolts into the bottom flange of the header so there is only about 1/8 inch of threads before the middle non threaded part of the bolt.
Next, pair the downpipe and header flanges together along with the new gasket. Finger tighten on all 3 of the 15MM nuts onto the bolts, and then tighten them with a ratchet. (Do not over tighten!) Be sure there are threads exposed on both sides, the header and beyond the nuts like this.
Once those bolts are tightened on, the rear downpipe flange should be pretty much mated up with the flange for the rest of the exhaust. Reinstall the 2, 14MM bolts.
(Step 10) Reclip both sensors, and reinstall the bottom heat shield. The top heat shield will take a little hand bending and manipulating but it can be reinstalled also, with the exception of one bolt.
Now start the car and check for leaks. If there are none, Go rip down the street and enjoy your new header!