
cobalt123
Platinum Member
Disclaimer: I cant take credit for the how-to, if its yours pm me will discuss it there.
90mm CCFL halos
100mm CCFL halos
Hot Glue Gun
Superglue
Dremel Rotary Tool
I got the CCFL halos from Retro Solutions on ebay. Quality is top notch and i recommend these for anyone doing this mod. http://stores.ebay.com/Retro-Solutions-LLC
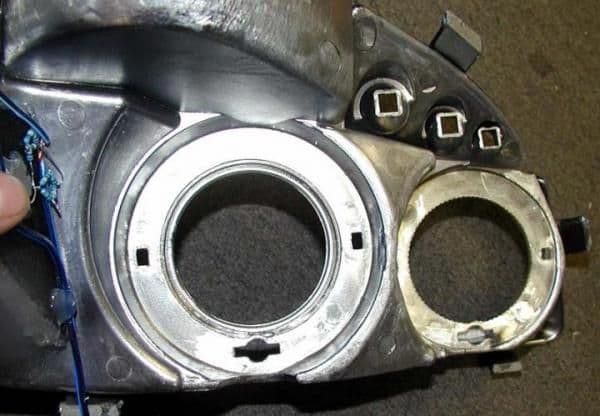
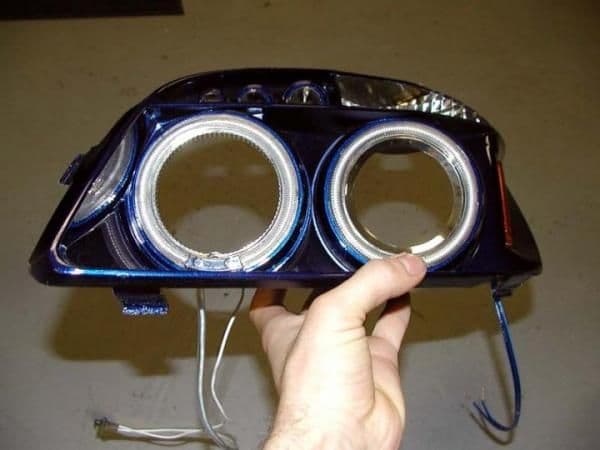
Your going to need to take apart the lights first. The only part your going to be needing to do this is the 2nd visual layer. I previously had them painted Laser BLue to match my car I also added some LEDs as well but ignore that.
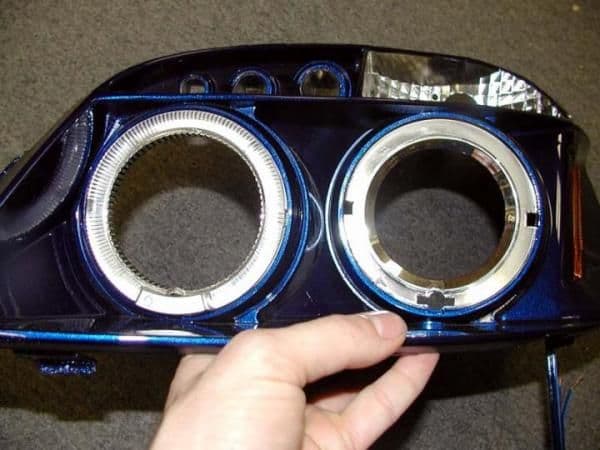
Below is the piece your going to be working with. The pics show how they come "stock"
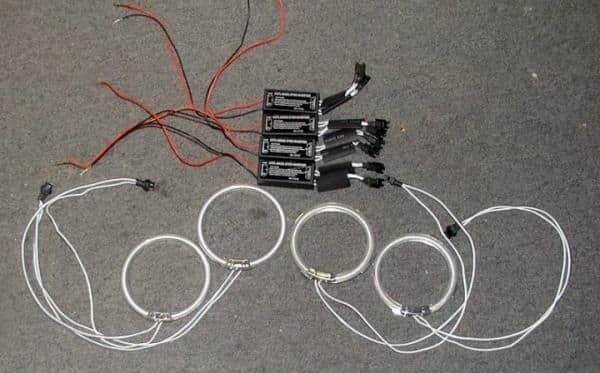
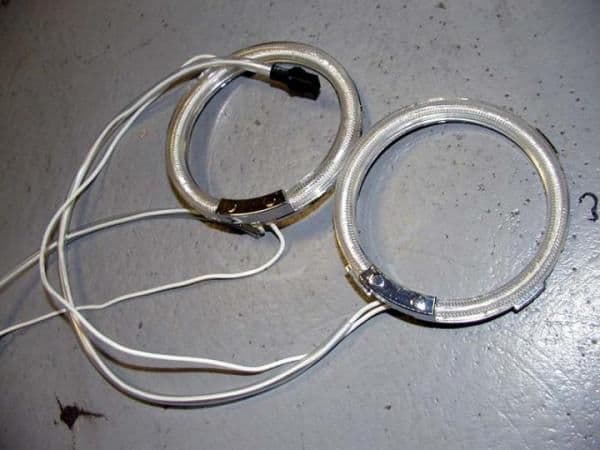
Here's all the hardware included with the CCFLs. 2 halos of each size along with 4 universal power inverters.
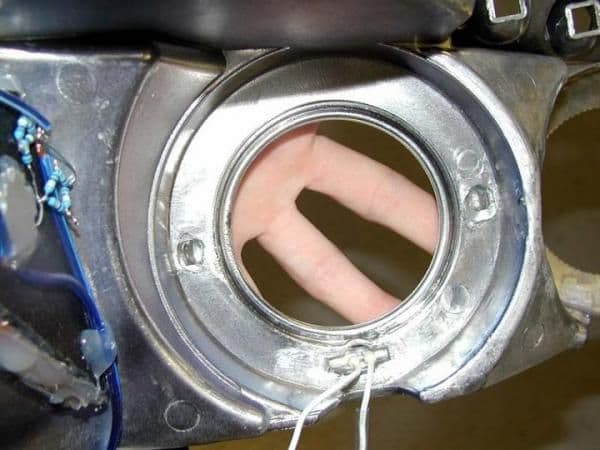
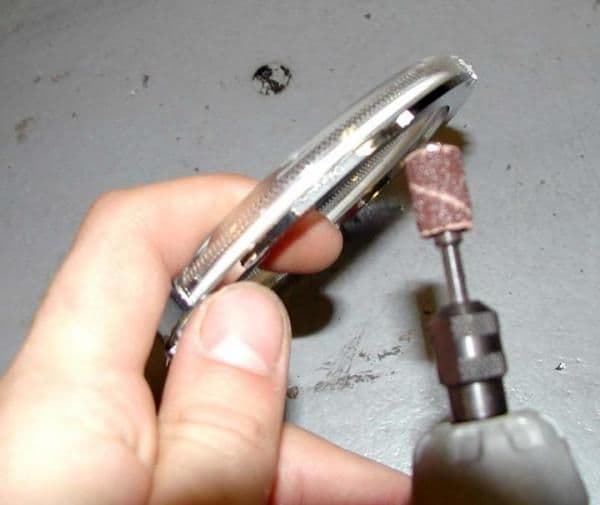
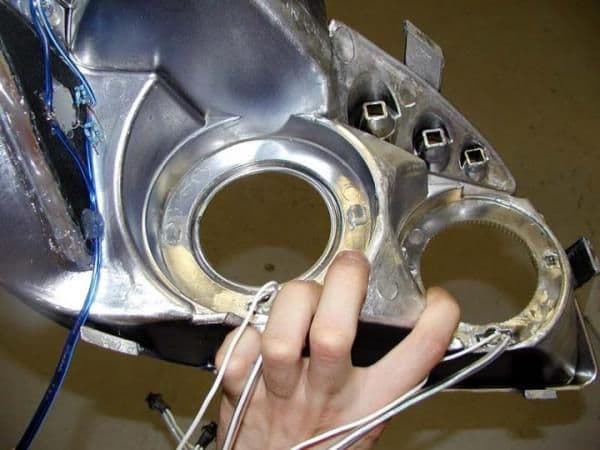
1st thing you'll notice is the quick disconnect on the CCFL's themselves doesnt quite fit the stock hole for the led piece that would light up the halos. Your going to want to Use your dremel along with a small cone grinder bit to slightly bore out the hole so they will fit. Since they are so close to fitting I just grinded the bottom of the holes. If you need to you can also grind the top as all this will be covered but the bottom is a bit more stable and hidden so i recommend starting with the bottom and grinding the top if necessary... I only had to grind the top on one of the 4 holes. In this pic you'll notice very little boring is needed. Left side is the unmodified one.
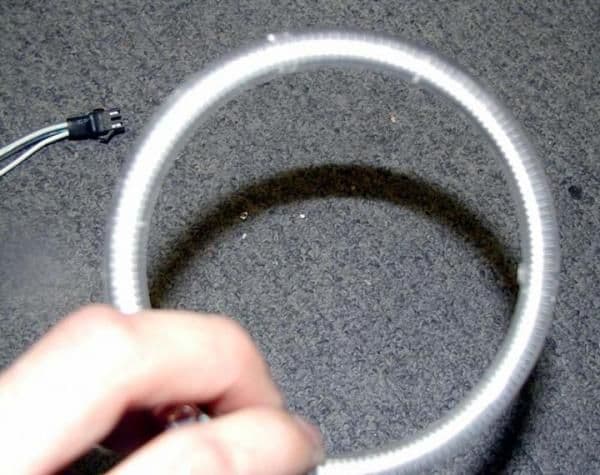
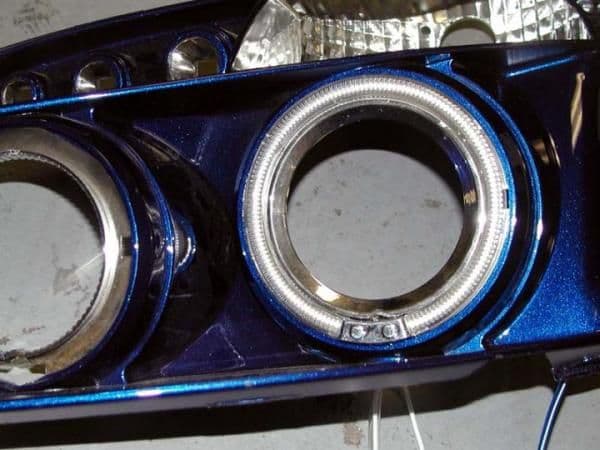
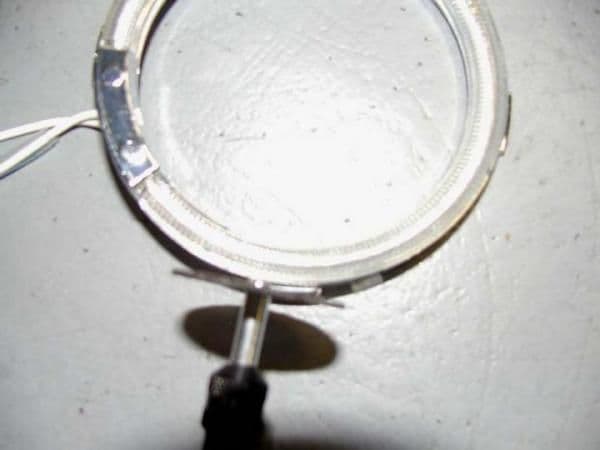
Heres the 100mm halo. This is the easy one it will just pop right in the Projector piece with no modification needed to the halo whatsoever.
Here it is just popped in with nothing holding it in place. It fits securely due to the bottom silver portion. You want to make sure that piece is fully in place before hot gluing the halo.
Nest your going to want to hot glue the CCFL in. The "stock" halos had 2 clips on the sides and were hot glued in only at those 2 points. I decided it would be best to just hot glue at those 2 points in case i ever had to replace these for any reason. You can also put a drop of hot glue or some other adhesive on the top of the halo for a bit better hold but that would make these permanent. I dont see any way of easily removing the CCFLs with any type of adhesive on the top of the halo. When your gluing in the CCFL you want to hold the halo itself in place with one hand and glue with the other. Watch out as the silver piece is very touchy and can easily fall out. Your going to fill both side holes with hot glue glue entirely along with spreading some around for a better hold. Here's what the finished product will look like once glued from the back
EDIT: after handling them for a bit id recommend using some superglue on at least the 100m halos around the projectors but you can also do it on the other ones too. The hot glue doesn't seem to hold up with the heat of the projectors and since they weren't as tight of a fit as the 90mm they might unglue.
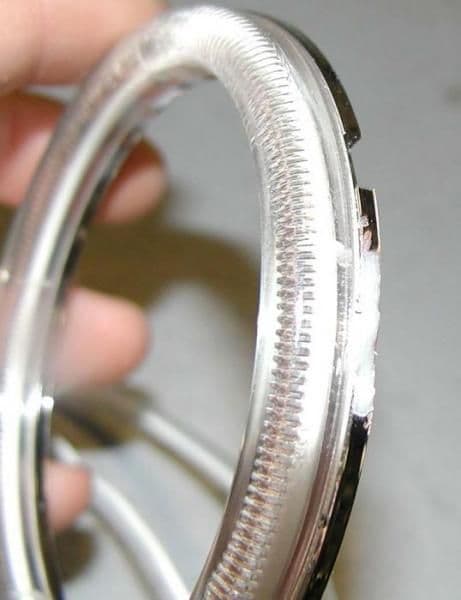
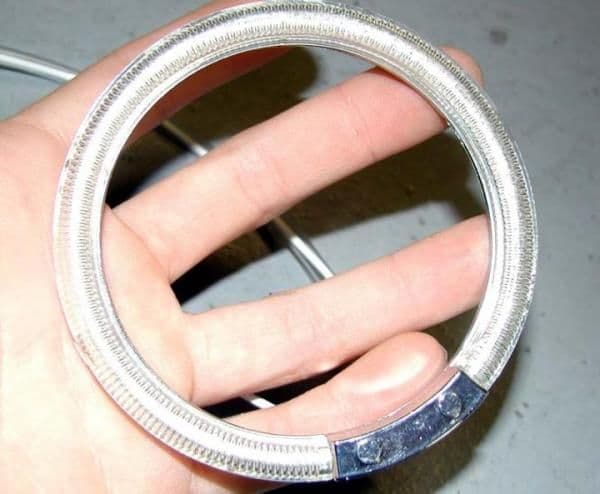
You'll notice on the 90mm halo it has 3 big clips on the halos themselves. The 100mm had them to but they were small and didn't get in the way. These must be removed from the 90mm halo before they will fit
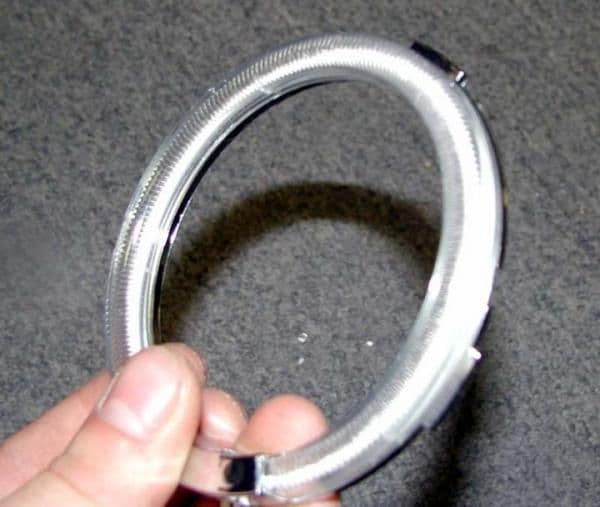
Here's a few quick pics of comparing a 90mm halo with the clips with one where they are removed
To remove these clips i got my dremel again and used both the cutting disc and the grinder bit. I opted to use the cylinder shaped bit vs the cone as before to keep everything even. I also found it easiest to do all the cutting first before any grinding. I also thought it was easist to cut from the side vs from the top as shown in the next pic BUT everyone is different. You also must be very careful one slip of the hand could be bad news.
The grinding portion is really to get everything flush to fit in the halo. perfection isnt needed but the more level it is the easier it will be to fit.
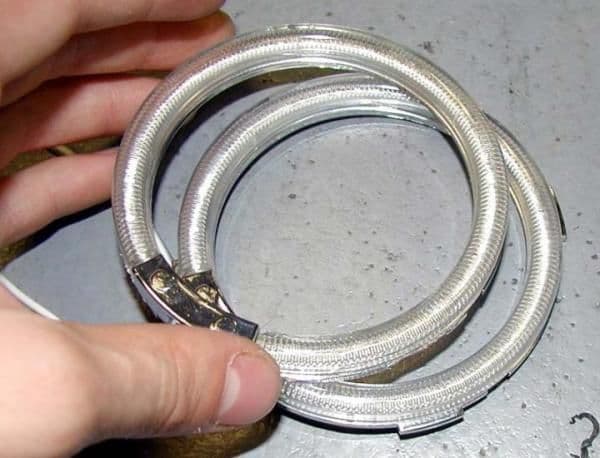
Here's an idea of what the halo should look like when your done
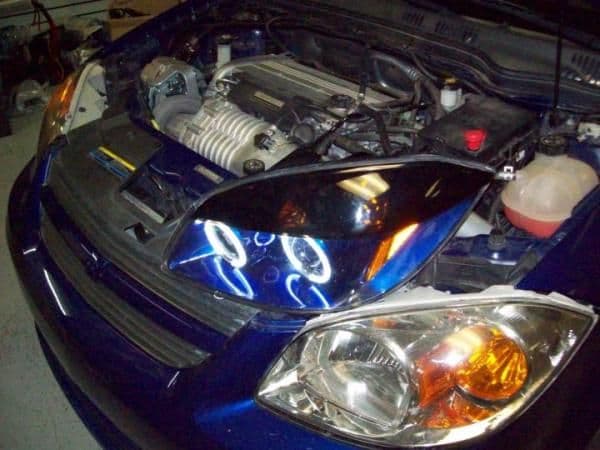
Just like the big halos your going to want to hot glue them in. Here's some pics of your finished product.
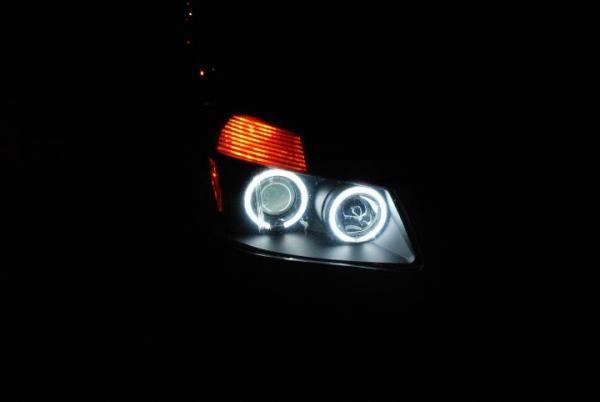
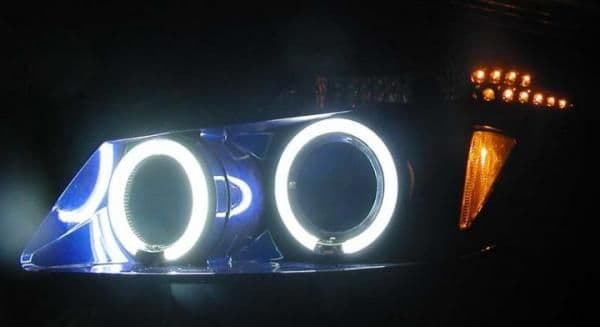
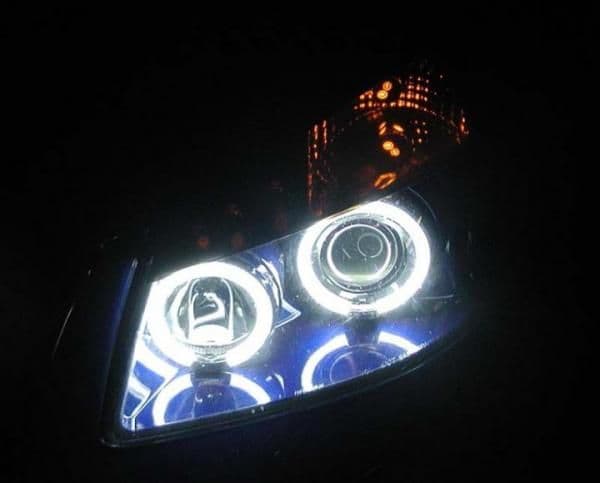
Finally heres a pic of them lit up on a power supply. They are super bright in person and even thou i never had the stock LEDs in the halos so i cant really make a comparison on how much brighter they are i can tell from the pics on the net they are brighter and this mod is very much worth it.
All put together waiting on the rubber seals to install. I wired the halos to the parking light so here's just that on
Vid of the leds in action
http://www.youtube.com/watch?v=XTqXreJURLQ
Oh one last thing... for anyone wondering since each power inverter has 2 outputs you can use one per set if you'd like. Only reason to use both would be to wire them up separately
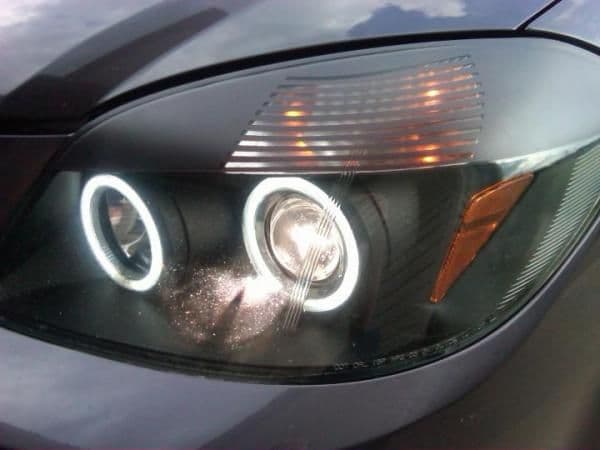
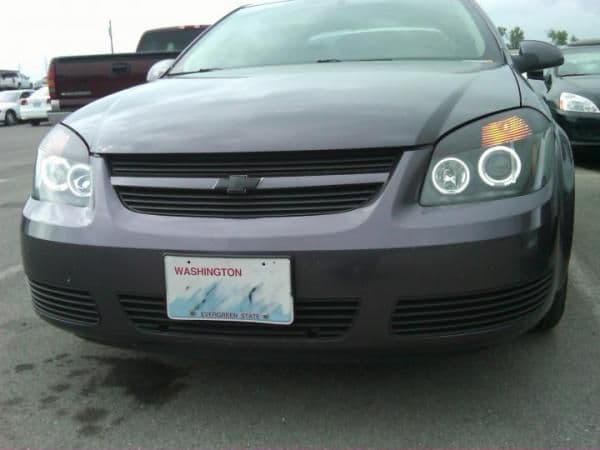
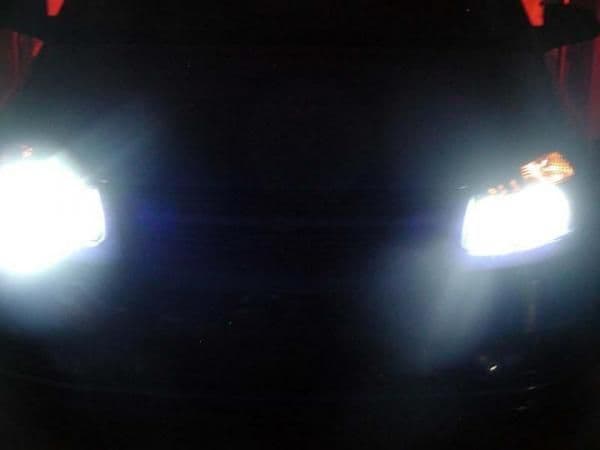
Here's the pics of them on the car. Both are with the parking light only
90mm CCFL halos
100mm CCFL halos
Hot Glue Gun
Superglue
Dremel Rotary Tool
I got the CCFL halos from Retro Solutions on ebay. Quality is top notch and i recommend these for anyone doing this mod. http://stores.ebay.com/Retro-Solutions-LLC
Your going to need to take apart the lights first. The only part your going to be needing to do this is the 2nd visual layer. I previously had them painted Laser BLue to match my car I also added some LEDs as well but ignore that.
Below is the piece your going to be working with. The pics show how they come "stock"
Here's all the hardware included with the CCFLs. 2 halos of each size along with 4 universal power inverters.
1st thing you'll notice is the quick disconnect on the CCFL's themselves doesnt quite fit the stock hole for the led piece that would light up the halos. Your going to want to Use your dremel along with a small cone grinder bit to slightly bore out the hole so they will fit. Since they are so close to fitting I just grinded the bottom of the holes. If you need to you can also grind the top as all this will be covered but the bottom is a bit more stable and hidden so i recommend starting with the bottom and grinding the top if necessary... I only had to grind the top on one of the 4 holes. In this pic you'll notice very little boring is needed. Left side is the unmodified one.
Heres the 100mm halo. This is the easy one it will just pop right in the Projector piece with no modification needed to the halo whatsoever.
Here it is just popped in with nothing holding it in place. It fits securely due to the bottom silver portion. You want to make sure that piece is fully in place before hot gluing the halo.
Nest your going to want to hot glue the CCFL in. The "stock" halos had 2 clips on the sides and were hot glued in only at those 2 points. I decided it would be best to just hot glue at those 2 points in case i ever had to replace these for any reason. You can also put a drop of hot glue or some other adhesive on the top of the halo for a bit better hold but that would make these permanent. I dont see any way of easily removing the CCFLs with any type of adhesive on the top of the halo. When your gluing in the CCFL you want to hold the halo itself in place with one hand and glue with the other. Watch out as the silver piece is very touchy and can easily fall out. Your going to fill both side holes with hot glue glue entirely along with spreading some around for a better hold. Here's what the finished product will look like once glued from the back
EDIT: after handling them for a bit id recommend using some superglue on at least the 100m halos around the projectors but you can also do it on the other ones too. The hot glue doesn't seem to hold up with the heat of the projectors and since they weren't as tight of a fit as the 90mm they might unglue.
You'll notice on the 90mm halo it has 3 big clips on the halos themselves. The 100mm had them to but they were small and didn't get in the way. These must be removed from the 90mm halo before they will fit
Here's a few quick pics of comparing a 90mm halo with the clips with one where they are removed
To remove these clips i got my dremel again and used both the cutting disc and the grinder bit. I opted to use the cylinder shaped bit vs the cone as before to keep everything even. I also found it easiest to do all the cutting first before any grinding. I also thought it was easist to cut from the side vs from the top as shown in the next pic BUT everyone is different. You also must be very careful one slip of the hand could be bad news.
The grinding portion is really to get everything flush to fit in the halo. perfection isnt needed but the more level it is the easier it will be to fit.
Here's an idea of what the halo should look like when your done
Just like the big halos your going to want to hot glue them in. Here's some pics of your finished product.
Finally heres a pic of them lit up on a power supply. They are super bright in person and even thou i never had the stock LEDs in the halos so i cant really make a comparison on how much brighter they are i can tell from the pics on the net they are brighter and this mod is very much worth it.
All put together waiting on the rubber seals to install. I wired the halos to the parking light so here's just that on
Vid of the leds in action
http://www.youtube.com/watch?v=XTqXreJURLQ
Oh one last thing... for anyone wondering since each power inverter has 2 outputs you can use one per set if you'd like. Only reason to use both would be to wire them up separately
Here's the pics of them on the car. Both are with the parking light only
Last edited: