I just took out my inner two lights today (the smaller circles with reverse lights in them). I took them out because I am planning on hooking up LED strips to the inside and attaching to brake light wires so that I have two extra brake lights. I have everything under control, but I just can't seem to get the glue undone no matter what I try. Ive tried the blow dryer, hot water, knives haha and nothing will work. Can anybody help me with how the remove the glue holding the light together? Much appreciated.


You are using an out of date browser. It may not display this or other websites correctly.
You should upgrade or use an alternative browser.
You should upgrade or use an alternative browser.
Taking apart reverse light housings
- Thread starter RichardWW
- Start date
Tuner923
Full Access Member
from what i've heard they are really a pain in the butt. I'll see what I can find maybe someone has some tips for getting them apart
---------- Post added at 02:07 AM ---------- Previous post was at 01:35 AM ----------
I found this..
---------- Post added at 02:07 AM ---------- Previous post was at 01:35 AM ----------
I found this..
all pics taken wiht my phone , sorry about quality
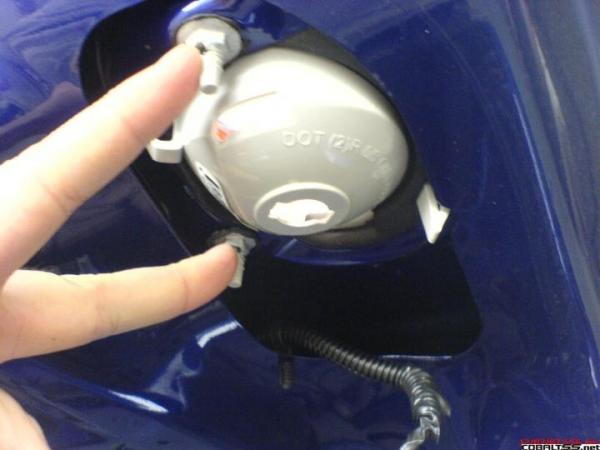
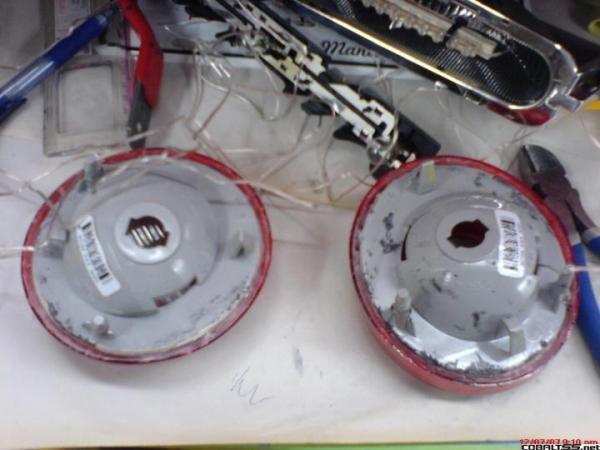
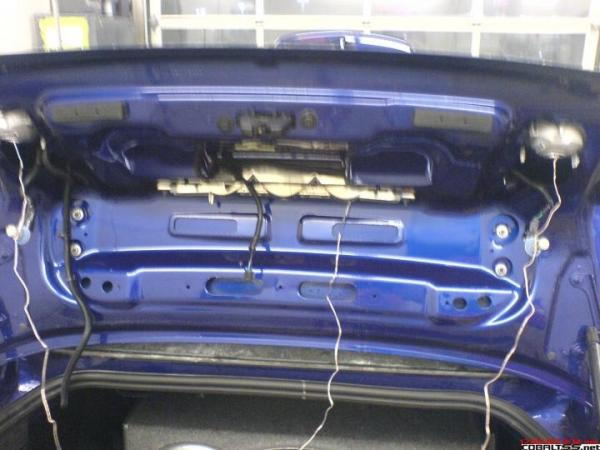
frist you need to remove the plastic covers that cover the reverse lights on the backside of the trunk.flat head screw driver and a slight twist and they will release from the trunk. then remove the carpeting by cutting the heads off or using a trim tool to remove the 8 clips holding the carpet on.now you can get started in taking the lights out.using a 11 mil socket take 2 nuts off that hold light in trunk and remove reverse bulb and socket with a twist
1.
2.

pry gently on the 2 little prongs on either side of the light to release them as well
3.
you now have the trunk light out . . . yaaaaah
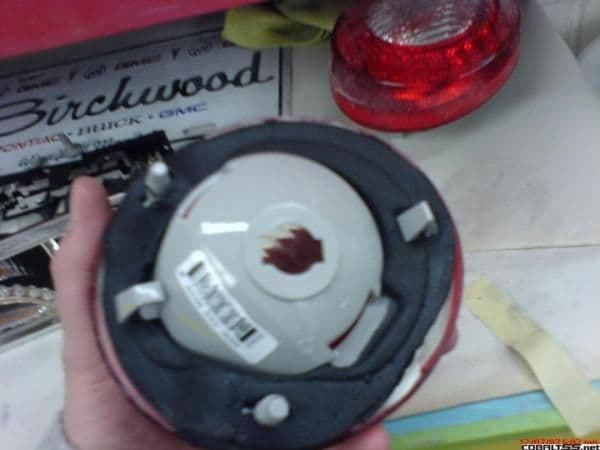
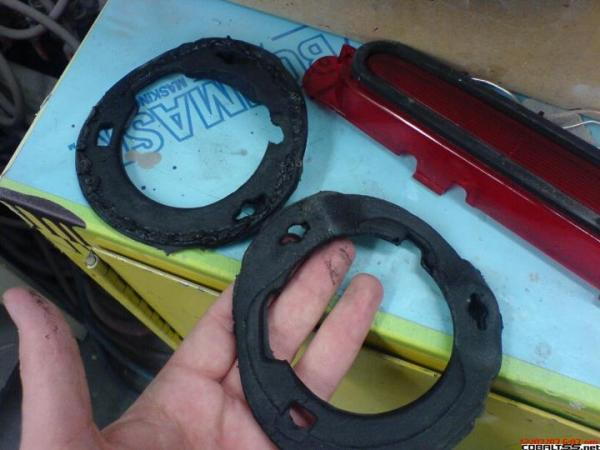
the black foam gaskets are next, be careful not to tear them while taking them off ! they are held on to the lights with a form of butal tape ( black sticky stuff ) this is very sticky!
4.
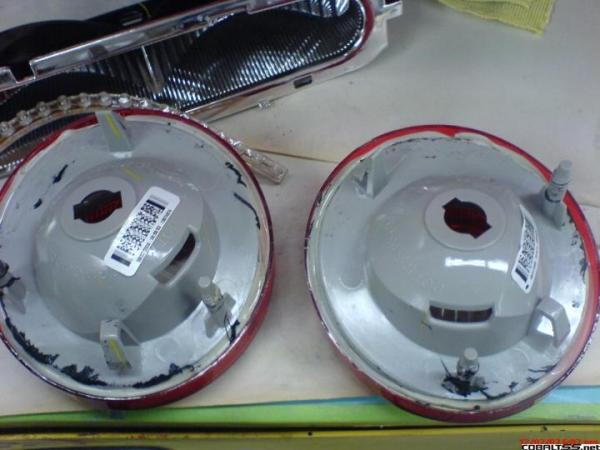
now you have the painstaking process of remove the sealent from between the lens and housing. i started using a heat gun but noticed the lense was getting to hot and with it being so thin, it would distort. i let it cool down and used a drill with a 1/8 drill bit to cut all the sealent out . drilling a small hole and then rotating lens around moving drill bit. be careful ,one slip and you need a new lens . her is a pic with sealent removed
.... an hour goes by . . . .
place the seperated lens back into the trunk lid so you know wich way is up and down
5.
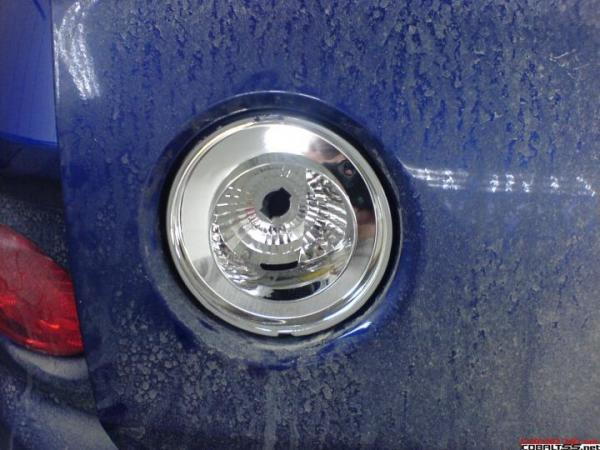
i know , my trunk is filthy lol
6.
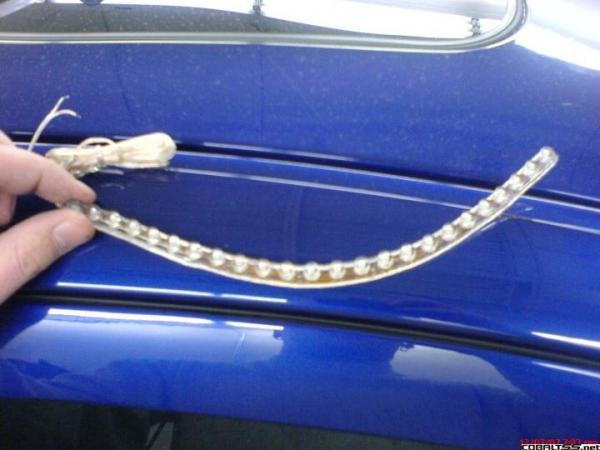
this is the l.e.d. i used , 1 per lens. sealed , flexible , can be mounted in the car or out of the car . . .good product picked up at local surplus store
7.
place l.e.d. in to light and position, remove l.e.d. and run a layer of glue around outer lens where you want the light to be. i used a 3m product called super fast adhesive for plastics ( i work in a body shop so it was readilly available lol )
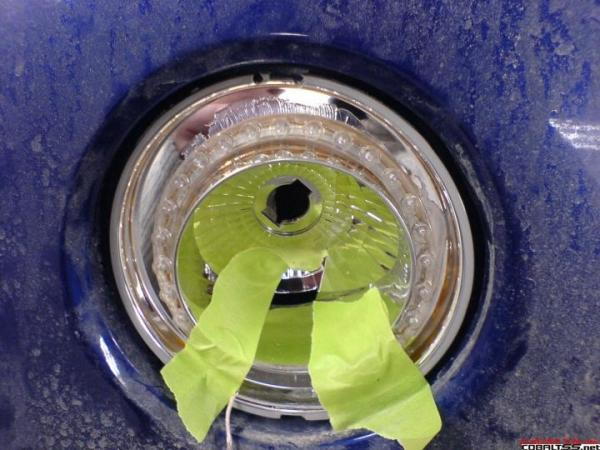
tape is shown to hold ends in place so glue could set up
8.
now that they are glued in place, run your wires through the slots in the side of the light. not where the reverse light goes but below it
9.
with the wires exposed out the side , re silicone with an all weather silicone and let dry.once dryed,install the black foam gaskets back on the lights.they only fit one way so if it doesnt look right try to seat it better. mount back into trunk lid and pull your wires through
10.
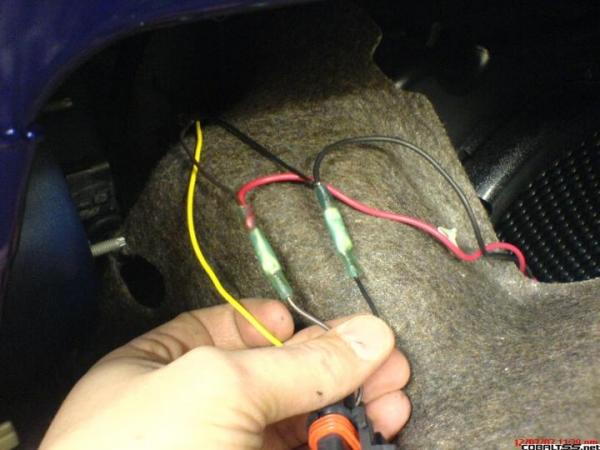
now the fun begins , run your lengths of wire form the pass reverse light all the way through the trunk lid down. down the wire loom on the right underneath to the area where your trunk light is located.hide all your wires and run them to the brake light on the passenger side.un plug the bulb entierly form the light so you have more room to work.
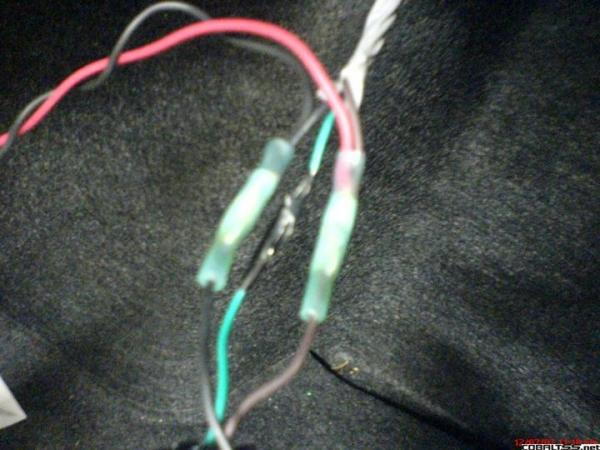
cut your brown and black wires only about 2.5 inches from the socket giving you enough room to strip the ends of the wires.do not touch wires together or you will blow fuses !
* if you do blow a fuse like i did, passenger side foot area # 9 , it's a 10 amp mini fuse lol*
join your positive wire to the brown wire and join them all together. join your negative wire to the black wire. i chose to use the style of connector that i did cause it is also a heat shrink style.crimpit, heat it , black tape it and your done . no moisture can get in side of the conection.
plug light all back together and your done on that side
11.
do the exact same on the drivers side . brown = positive , black = negative
now start cleaning up all your wiring cause your done.make sure to use black tape and go everything you have cut and spliced.use cable ties to make things look neater the same with using wire loom .
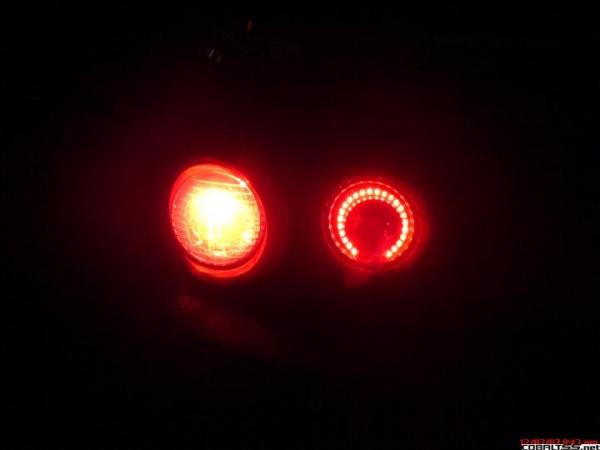
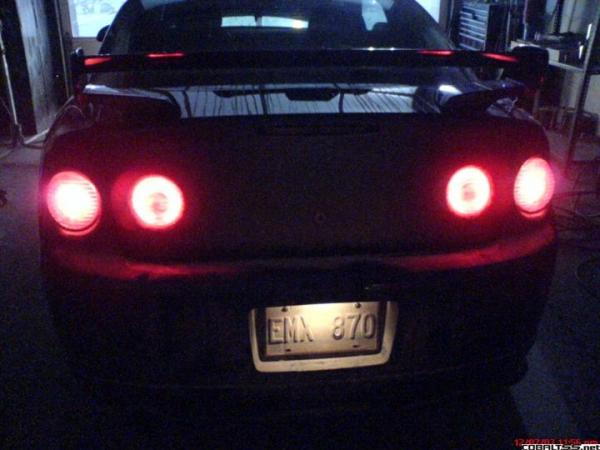
reinstall your black caps over the reverse lights and install carpeting back on trunk lid.close trunk turn on your headlights and shut the lights off in the shop and enjoy . . . you now have 4 running lights in the back and everything functions the way its supposed to ! have a smoke , you earned it lol
p.s. i know my car is dirty ! :twothumbs
06CobaltLS
Full Access Member
i wish the sedan could do this..maybe a custom thing to convert the rear of the sedan into the rear of a coupe...hmmmm 
i wish the sedan could do this..maybe a custom thing to convert the rear of the sedan into the rear of a coupe...hmmmm
Can be done, need a coupe rear bumper, trunk, and all 5 tail lamps. (maybe not the center one, not sure)
Tuner923
Full Access Member
i wish the sedan could do this..maybe a custom thing to convert the rear of the sedan into the rear of a coupe...hmmmm
it's been done. I want to convert mine from cobalt coupe to G5 coupe rear.